Save Apple Music Songs on SD Card
Save Apple Music Songs on SD Card
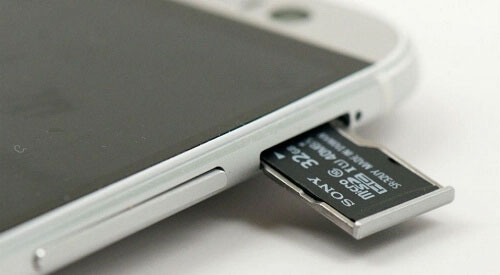
If you're an Android fan and want to switch to a phone with more capacity, but want to keep your budget in check, you might opt for an Android phone that supports an SD card.
An SD card with the same capacity is much cheaper than adding the same built-in storage on a mobile phone, which is why many people choose to buy an android that supports sd cards. But you may feel that there are fewer and fewer new Android phones that support SD cards. Of course, this is not an illusion. In fact, due to various reasons (the most important being profit), mobile phone manufacturers are more inclined to directly provide large-capacity mobile phones instead of small-capacity plus SD card support.
SD cards on Android phones are usually used to store larger files like videos, or a large number of pictures and music. If you subscribe to Apple Music and plan to download a lot of songs to enjoy offline, it is definitely a wise choice to set the download directory of Apple Music to the SD card. If you have downloaded songs to the device storage before, and now want to move the songs to the SD card, it is actually feasible.

However, the Apple Music songs downloaded to the SD card are protected by DRM. When you remove the SD card from the Android device and insert it into other devices, the Apple Music songs in the SD card cannot be recognized, so they cannot be played. If you have some video editing apps installed on your Android phone, there is no way to add these songs as background music to the video editing apps. If the SD card stores regular audio files such as MP3, M4A or WAV, there will be no such annoying problems. Therefore, it will be much more convenient to convert Apple Music songs to MP3 or other formats, and then save them to SD card.
Read our article to know more details and you will surely be amazed by our solutions.
- Part 1. Why More and More Manufacturers No Longer Support SD Card
- Part 2. How to Save or Move Offline Apple Music Songs to an SD Card on Android
- Part 3. AudGeek AppliTune Converter: A Better Solution to Save Apple Music Songs on SD Card
- Part 4. How to Convert Apple Music to MP3 or Other Formats
- Part 5. How to Copy Converted Apple Music Songs to an SD Card
Part 1. Why More and More Manufacturers No Longer Support SD Card
In the past, many models released by many manufacturers supported SD cards, but why has this situation changed completely now? There are several reasons why more and more manufacturers have decided to no longer support SD card or MicroSD card in their Android phones.
Cost decrease of internal storage: As the price of NAND flash memory has come down, manufacturers have been able to offer larger internal storage options without significantly increasing the cost of the device.
Design factors: Removing the SD card slot can allow for a slimmer, sleeker design. Additionally, the use of UFS (Universal Flash Storage) and NVMe (Non-Volatile Memory Express) storage has allowed for faster data transfer speeds and improved performance, which further reduces the need for SD card.
Cloud storage: With the increasing availability of cloud storage services like Google Drive, OneDrive, Dropbox, etc., some manufacturers may believe that users are less likely to need SD card.
Cost reduction of other factors: By removing the SD card slot, manufacturers can save on costs, as they don't have to include the hardware and design features necessary to support SD card.
Profit increasing: By adding 64GB, 128GB, 256GB or more device storage, Android devices can be sold at higher prices. This is more profitable than providing SD cards.
Faster loading speed: If you are sensitive to loading speed, you can clearly feel that loading files, videos, music or pictures from internal storage will be faster than loading from SD card. It is especially prominent on some devices with slightly lower processing power.
It's important to note that some manufacturers still offer Android phones with SD card, and the decision to include or exclude this feature varies from one manufacturer to another. Ultimately, whether or not a phone has SD card is a trade-off between design, performance, cost, and user preference. If your Android device still supports SD card, then the capacity of SD card should be well utilized.
Part 2. How to Save or Move Offline Apple Music Songs to an SD Card on Android
If you have replaced a new Android device, installed the Apple Music App from Google Play, logged in to Apple Music and plan to download songs for offline listening, then we recommend that you first set the download directory of Apple Music to SD card.
If you have downloaded Apple Music songs to the device storage, you can also move these offline files to the SD card through the settings, which can clear up some device storage space and get a better experience. Of course, after this setting, future songs will be automatically downloaded to the SD card.
In fact, the operation is basically the same in both cases. The difference is that you need to confirm when moving the files from device storage to SD card.
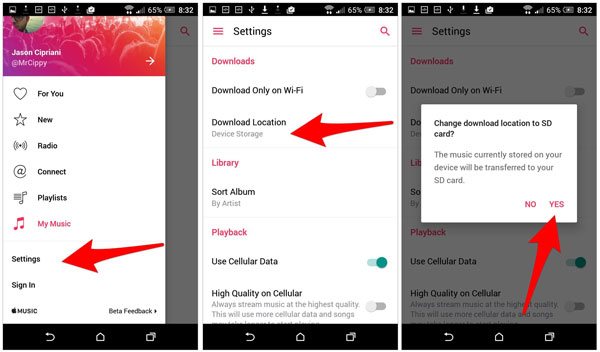
Step 1: Launch Apple Music on your Android mobile phone, tap on menu icon in upper left and tap on Settings.
Step 2: Tap "Download Location" option in the Downloads section, you will see a popup dialog "Change download location to SD card?" The dialog also tells you that "The music currently stored on your device will be transferred to your SD card."
Step 3: Tap "Yes" and you will be asked whether you want to move all of your currently downloaded music, along with any future music to your SD card. Just simply aceept this prompt. Depending on the amount of your offline Apple Music songs, it may take some time to finish the moving.
However, unlike MP3, M4A or WAV files saved in SD card, the Apple Music songs on SD card can't be recognized by other devices, nor can they be used as background music in video editing programs or apps. We all know that Apple Music is different from the M4A songs purchased in the iTunes Store. Apple Music's built-in protection means that these songs can only be played on the phone with the Apple Music App. If the music files on SD card have multiple uses, you will definitely be interested in the topic of how to save Apple Music to SD card like saving MP3.
In fact, the professional Apple Music Converter called AudGeek AppliTune Converter provides a better solution. Let's check what it can do.
Part 3. AudGeek AppliTune Converter: A Better Solution to Save Apple Music Songs on SD Card
AudGeek AppliTune Converter can easily convert Apple Music songs, albums and playlists to M4A, MP3, WAV, etc. which you can easily copy to an SD card. It comes with user-friendly interface, fast conversion speed, high-quality output files and flexible options. This tool perfectly resolved the problems of the Apple Music songs on SD card we mentioned above.
 AudGeek AppliTune Converter: Copy Apple Music to SD Card
AudGeek AppliTune Converter helps you to convert Apple Music songs to MP3, M4A, etc. which can be easily saved on SD card and used by various programs and apps without any hassle.
- Convert Apple Music songs, albums and playlists to MP3/M4A/WAV at 20X faster speed.
- Convert Apple Music to M4A with a built-in web player without iTunes or Music app.
- Keep music information like title, album, artist, track number and artwork in output M4A files.
- Rename converted M4A files by title, album, artist, track number, hyphen, space, etc.
- Sort converted M4A files into album, artist, album/artist or artist/album folders as you like.

Before purchasing, we highly recommend you download the free trial version to have a test first. The free trial version can only convert 3 files at a time and can only convert 3 minutes for each file. If you are satisfied with the features and output files, you can purchase a license to get a registration code to unlock the limitations and enjoy all wonderful features.
Part 4. How to Convert Apple Music to MP3 or Other Formats
AudGeek AppliTune Converter makes use of a built-in Apple Music web player to convert the songs to MP3, M4A or WAV, so you don't need to download the Apple Music songs to iTunes or Music app first. AudGeek AppliTune Converter comes with an easy-to-use interface, so both software veteran and beginners can know how to use it in only a few seconds. If necessary, you can also check the steps below as a reference. All you need is just a stable internet connection.
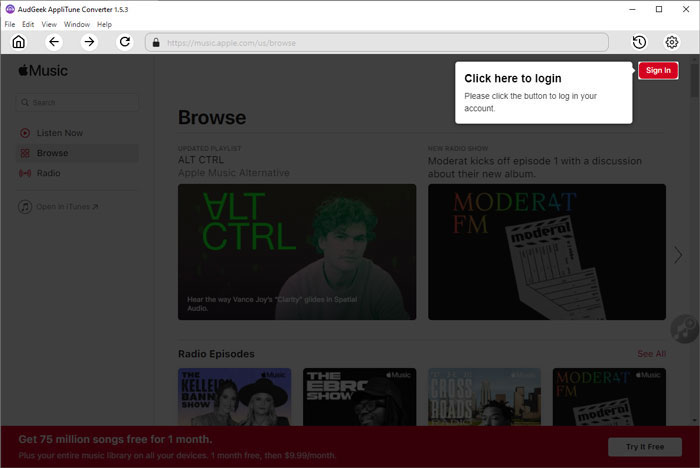
Step 1 Sign in Apple ID on AudGeek AppliTune Converter
Launch AudGeek AppliTune Converter after installing it, and you will see a built-in Apple Music web player and "Sign In" button as well as hint message at the upper right corner. Click "Sign In" button to sign in Apple ID. You don't need to sign in again next time if you don't sign out.
Step 2 Choose an output format
By default, AudGeek AppliTune Converter uses AUTO option as output format. AUTO option is actually 256kbps M4A format. If this is OK for you, you don't need to change output format. However, if you need to use other audio format for your SD card, you can click the gear icon at the upper right corner to open Settings dialog and choose other format instead. If necessary, you can also change output folder, choose how to rename the output files and how to sort output files into folders.
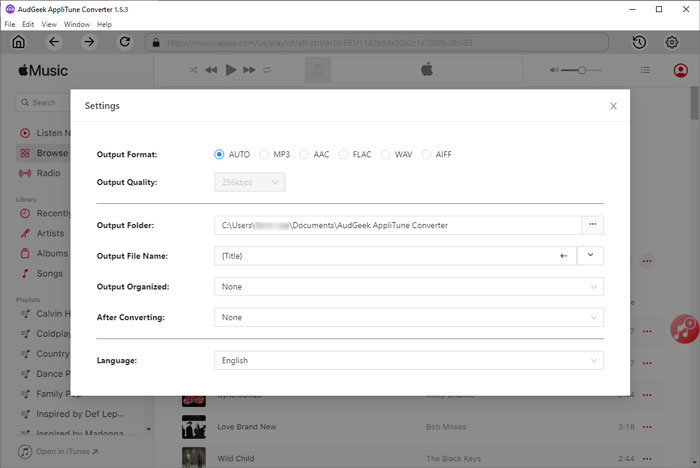
Note: If you want to locate the output audio files after conversion, you can select "Open the output folder" in "After conversion" list.
Step 3 Add album or playlist to conversion list
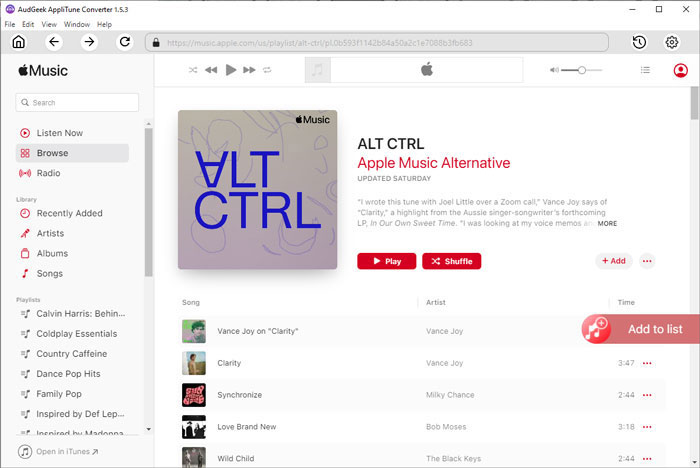
Go back to built-in Apple Music web player, open detailed page of your favorite album or playlist, and click "Add to List" button in the middle right, then all the songs in the album or playlist will be added to conversion list.
Step 4 Start Apple Music conversion
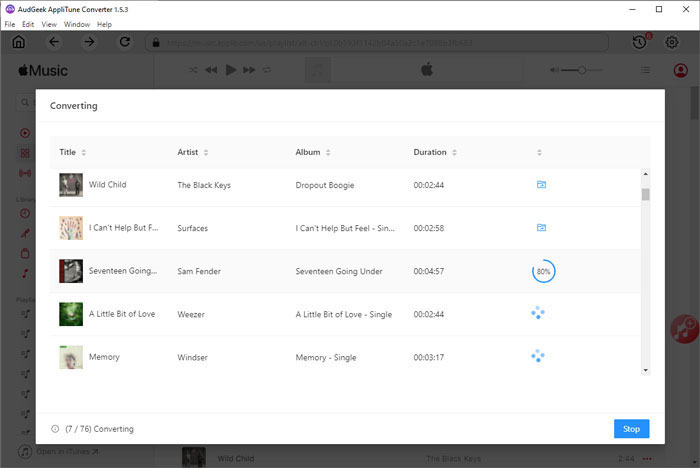
By default, all songs will be checked and you can check title, artist, album, duration and artwork. If there are some songs you don't want to convert, simply uncheck them. After choosing the songs, simply click "Convert" button to start Apple Music conversion. The Apple Music converter can convert Apple Music songs at 20X faster conversion speed, so you don't need to wait for a long time.
Once Apple Music songs have been converted to MP3, M4A or your select format, you can copy them to the SD card to meet your different requirements.
Part 5. How to Copy Converted Apple Music Songs to an SD Card
On computer, it is a simple matter to copy and save converted Apple Music songs to SD card. However, depending on whether the computer has an SD slot, the processing method is still somewhat different.
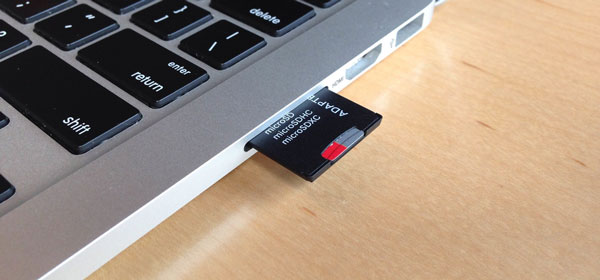
If the computer itself has an SD slot, you can directly insert the SD card into the SD slot. In this case, the SD card will be set as a removable device like a USB flash drive. Just copy the songs from the output directory to the SD card.
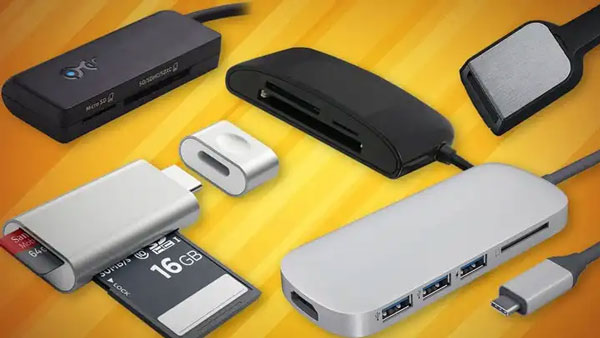
If your computer doesn't have an SD slot, you can only use a card reader. First insert the SD card into the card reader, and then insert the card reader into the USB port of the computer, so that the SD card will be displayed as a USB flash drive. However, some Macs don't even have a USB port, so you need to prepare another adapter.
If you're going to plug the SD card into a car player or some other device to play the converted Apple Music songs, chances are you'll need to copy all the songs to the Music directory.
Bottom line
Android devices that support SD cards are decreasing, but computers that support SD cards seem to be increasing again. In any case, SD card is an economical capacity expansion solution, and it is also a very convenient file sharing tool. If you subscribe to Apple Music and want to save Apple Music songs to SD card, AudGeek AppliTune Converter is definitely a good solution. we recommend you download AudGeek AppliTune Converter to have a free trial first.